Search the documentation
Enter at least 2 characters
Enter at least 2 characters
 |
CAE Fidesys 9.0 Documentation |
To correct the geometry, one should find poorly defined geometric entity and "heal" them using special master tools available in Fidesys. Naturally, inconsistencies can only be found if their detection meets the capabilities of the program. It is always a good idea to test the imported geometry using the tools available. In this example, the previous step found some poorly defined curves. This step demonstrates how to use the power tools to correct these curves.
In the list of existing problems, select all the poorly defined curves by holding down the Shift key while selecting them.
Right-click on the selected group and in the additional panel (see below) select the appropriate option to correct the geometry.
or
In the Power Tools menu, click the  (Heal Owning Volume) button.
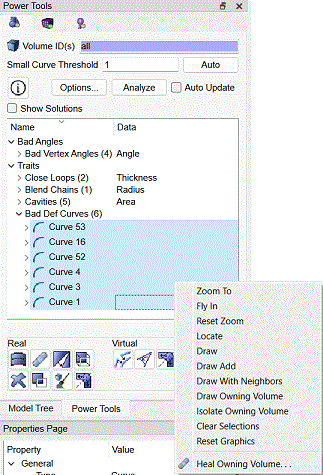
Figure 10 - Selecting and manipulating curves.
The geometry repair tools do not accept commands directly, but direct you to the Command Bar, where the corresponding elements are activated, as shown below.
Select Autoheal.
Click Apply.
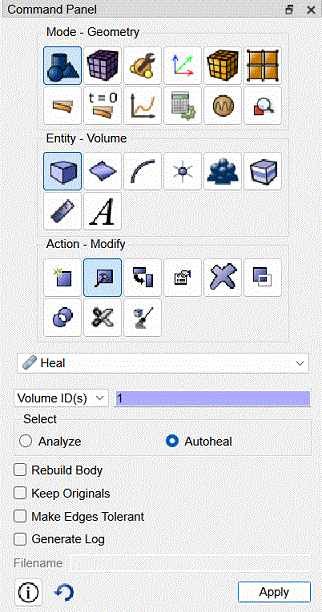
Fig. 11 - Selecting an item on the Command Bar for automatic curve healing.
The messages shown below appear in the command line window. Note the increase in the percentage of "good" geometry: before healing - 97%, after healing - 100%. Correction performed successfully.
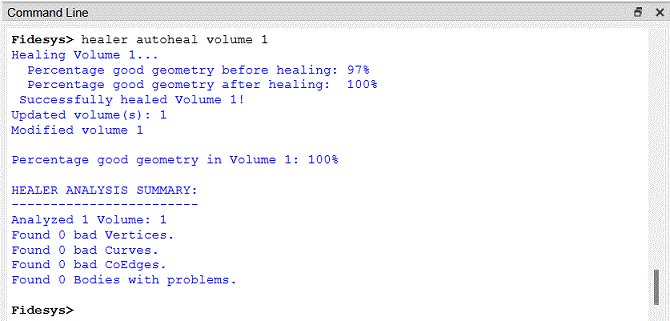
Fig. 12 - Command line messages about the percentage of geometry healing.
Analyze the geometry again to make sure that all the "bad" features have been removed.
To do this, click on the Diagnose Geometry icon, located on the Power Toolbar.

